Wednesday, November 9, 2011

Lancashire Hotpot

Autumn is upon us here in the cool, gray Pacific Northwest. The nights have grown cold (even a little frosty!) and the fall leaves are turning. It's the perfect time of year for hearty, warming meals. I have yet to make my first soup of the season, but recently I had another hankering for some piping hot, savory Britfood. To that end, I ventured into the kitchen to try my hand at Lancashire Hotpot.

Lancashire Hotpot is a one-pot dish, in the same family as casseroles or pot-a-feu. It's simple to prepare and ignore, as it cooks slowly at low to medium heat: you can assemble the ingredients, pop it in the oven, and leave it alone while you go do something else for awhile. The general ingredients are ground lamb, sliced potatoes, broth, root veggies, butter and seasonings. A traditional hotpot is made with lamb only, but I made mine with ground beef, and it turned out great. You can mix beef and lamb, as well as mixing up the various root vegetables depending on what you like or what's in season; you can also substitute flat beer or ale for part of the broth.

INGREDIENTS
About 1/2 lb. of ground lamb, beef, or a mix
2 or 3 carrots, sliced into 1-inch chunks or 1/4-inch medallions
1 medium white or yellow onion, in 1/2-inch dice
2 to 3 medium-sized firm potatoes cut into thin slices (stay away from baking potatoes; they fall apart too easily)
About 1/2 pound root veggies, cut into 1-inch chunks (try yams, parsnips, or turnips)
Broth (beef, or a mixture of chicken and beef)
Butter
Thyme
Salt & pepper

We used carrots, parsnips, turnips & red potatoes
INSTRUCTIONS
Preheat the oven to 350F.

Cook the ground meat in a little bit of butter or oil on the stovetop over medium heat until mostly cooked but not browned. Drain off most of the fat, then add onion and cook until translucent but not browned. Add carrots and root veggies. Season with thyme, salt and pepper to taste.

You can also cook the veggies first if you like.
 Cook until the meat is starting to brown.

Meat & veggies
 Transfer the lot to a casserole dish with a lid. Use a spoon to flatten out the top. Pour in the liquid until it almost covers the meat/veggie mixture. Put a layer of sliced potatoes on top of the mixture. Dot with butter, sprinkle salt & pepper to taste, then add another layer of sliced potatoes. Dot with butter again, put the lid on, and pop into the oven. (I recommend setting the casserole dish on a cookie sheet with a fairly deep lip, as the pot can bubble over and leak out while it's cooking if the lid isn't terrifically tight.)

Potatoes on top. Note level of liquid.
Cook for about an hour to an hour and a half, then take the lid off and cook for another 15 to 30 minutes to brown the top layer of potatoes.

Piping hot!
Serve with crusty bread, a winter salad, steamed winter veggies (like broccoli, mustard greens, or Brussels sprouts), and a good stout, dark ale or porter. Perfect for a chilly fall night.

Tuesday, October 11, 2011

Avocado Ice Cream


Important ingredients
This past weekend we packed up for another informal weekend at the family beach house, this time to celebrate Dear Spouse's (DS's) birthday. As usual, much food was brought down, recipes shared, and a good time was had by all.

Dear Spouse loves to tinker in the kitchen as much as Lexi and myself do, and this weekend he wanted to try his hand at making avocado ice cream. DS and I first sampled this treat several years ago on a vacation to Morro Bay. Our trip just happened to coincide with their annual Avocado & Margarita Festival, so we popped on down to the waterfront to check it out. Many of the local restaurants had booths open where we could nibble on nummies created using avocados as a prominent ingredient: that year we tasted shrimp and avocado cocktail, several kinds of sushi, and a delightful ceviche. But far and away our favorite was the avocado ice cream, made by the talented chefs at Windows on the Water. DS was so enamored of the creamy, honey-laden goodness that he nicked a margarita cup and went back to exchange enough booth tickets to fill it with ice cream. He's been wanting to try the recipe himself ever since.

So this past week found DS contacting our friends to find an ice cream maker or two. As luck would have it, one of our friends loaned us an ice cream bowl and paddle attachment for my trusty dusty antique KitchenAid mixer, and another managed to dig up an old-fashioned bucket-style electric ice cream maker from the early 1980's. As luck would also have it, avocados happened to go on sale this week. So we stocked up, DS did some recipe research, and we headed off to the beach house, avocados and ice cream makers in hand.

Here's what DS came up with.

INGREDIENTS (will make approximately 1 gallon of ice cream)
8 ripe avocados
1 qt whipping cream
1 qt 1% milk
1 c brown sugar
1 c granulated sugar
1 T vanilla extract (use genuine if you can get it)
Juice from 1/2 of a lime
Ice
Rock salt

INSTRUCTIONS
Peel, pit, and blend the avocados in a blender or food processor. Get them as finely blended as you can, removing any strings and pulverizing large chunks (though leaving small chunks is a nice textural touch). Transfer mashed avocados into a bowl and add cream and milk; stir together. Add sugar, vanilla, and lime juice and stir until all ingredients are well blended.

Transfer mixture to the ice cream maker and follow the manufacturer's instructions. The above recipe made about a gallon of ice cream in a bucket-style electric ice cream maker.

Phase One: Soft Serve
With this particular model of ice cream maker, DS turned the paddle on and let it mix until the paddle slowed and/or the motor stopped. At that point, the ice cream was supposed to have reached a soft serve consistency. In this case, however, DS ran into an issue: the outer layer of ice cream, smack up against the cold metal container, froze more quickly than the center, so the paddle stopped sooner than it was supposed to.

Taking a risk, DS took the next step: he removed the metal container, put a lid on it, and stuck it in the freezer, banking on the probability that the ice cream was already well-blended and would stiffen up if it was left to chill for awhile. His gamble paid off.

Phase Two: Hard Serve
When he removed the metal bucket from the freezer, the ice cream had stiffened up nicely. It ended up being somewhere partway between soft- and hard serve in consistency, smooth and creamy, with a pale greenish color to it and little bits of avocado throughout.

Phase Three: PROFIT!!
The final result was in-smegging-credible. Avocado is high in oil, so it emulsified readily, producing an evenly-textured ice cream broken by soft little chunks here and there. The amount of sugar was just enough to put an edge on the natural sweetness of the avocados, but not overwhelm it. The flavor of the avocados dominated the mixture, but was subtle and mellow in a way that only avocados can be.

We all ate three bowls of the stuff the first time around. The second time DS added cinnamon. Next time he's thinking of trying it with honey.

Friday, September 2, 2011

2,000 Cookies

Geeky Cookies
Left: Rice Krispies of Infinite Improbability. Right: Combustible Lemons.
An entire list of all Cookie Brigade recipes can be found on this site here.


The summer of 2011 was the Summer of the Cookie. In the spring, I had decided to join the Cookie Brigade, and bake cookies for charity at PAX Prime 2011. I gave up most of my summer to bake cookies. Yard projects started in April are still sitting there, overgrown with weeds and spiderwebs; my friends knew to come over only if they wanted to get elbow-deep in cookies; I gave or brought cookies to every event I attended for months. We made trip after trip to the restaurant supply store, purchasing 25 pound boxes of chocolate chips and 5 gallon buckets full of peanut butter.

Because I decided to set myself a goal to bake 2,000 cookies.

I don't know what I was thinking. For those of you who need that number quantified, that's a square metric asston of cookies.

Here are some interesting stats to put it all in perspective:
-40 pounds of chocolate chips
-5 gallons of peanut butter
-30 pounds of flour
-240 eggs
-25 pounds of butter
-14 hours of baking time
-8 large rubbermaid tubs of finished, wrapped cookies
-3 people took 4 hours to label all the cookies

In the end, it was completely worth it. The Brigade collected a record breaking $14,000 in donations over a 3-day weekend, thanks in part to my donation which made up 1/3 of the total. I spent the weekend hawking cookies to geeks in lines, hauling around tubs and bags of cookies, ignoring my boyfriend for hours and hours while I worked the crowds (thanks, Sweetie!). My feet ached, I was tired, and I missed the convention. But it was great. One of the best times I've had in years; I highly recommend volunteering for something like this because there's almost nothing you can do that's quite as rewarding.

I'd like to give a special shout out to my friends, who comprised the Infinite Improbability Baking Team. When my job got crazy busy in August, right in the middle of baking, they swooped in for the last couple of days and helped pull it all together at the last minute. Sara, DamantaMaith, AzBat5, Hottie Scottie, Deb, Emimonster, Menolly07 and Stephanie all came through to help to bake off the last of the dough, ice, decorate, wrap and pack.

Special thank yous to JobiWanKenobi - who funded much of the venture, and the Greenwood Market - who graciously stored tubs upon tubs of cookies in their freezer(Thanks Patty!).

I decided that I wanted to make big, sturdy, delicious cookies that could stand up to the expectations of a coffeehouse culture. To that end, I decided to split the effort into fourths: 3/4 easy drop cookies, and 1/4 specialty, themed and gamer cookies.

Final Results:
48 Dz Double Chocolate Chip Cookies
42 Dz Chocolate Chip Cookies
20 Dz Peanut Butter Chocolate Chip Bacon Cookies (Gluten Free)
12 Dz Peanut Butter Chocolate Chip Cookies (Gluten Free)

20 Dz Star Wars Sugar Cookies
20 Dz Rice Krispie Treats with Toppings
7.5 Dz Combustible Lemons - A spicy/tart lemon sugar cookie with cayenne
3 Dz Coconut Lime Sugar Cookies
2 Dz Bacon Wrapped Oreo Stuffed Chocolate Chip Cookies
2 Dz Bacon Wrapped Nutter Butter Stuffed Double Chocolate Chip Cookies
1 Dz Splicer Mask Sugar Cookies

I started making dough in June. This is 16 batches of double chocolate chip dough.

Using a #20 (2.5 oz) scoop, the dough was scooped and frozen, then vacuum sealed 2 dozen at a time, in 1-gallon Ziploc freezer bags. When it came time to bake, the dough was sheeted, thawed and baked off.


We had a terrific time with some of the more unusual cookies.

Monday, August 15, 2011

Cherry Bounce (Cherry Cordial)

This post has been removed.  Sorry!  See our post on the finished Cherry Bounce here.

Sunday, July 31, 2011

Perfect Cherry Pie

Cherry Pie


Cherry pies are tricky: if you're not fortunate to live in an area where pie cherries are grown, you're probably used to the pies made with canned cherry pie filling. The difference between those pies and a pie made with fresh cherries is, well, like the difference between canned chicken and fresh roasted chicken. Hardly the same. Check out the post about how we got fresh Pie Cherries.

If you don't have a go-to pie crust recipe, try using the boxed pie crust mix from Krusteaz. It's really very surprising how good it is. I can't stand the premade crusts in the refrigerator section in the grocery store: they almost always come out like cardboard. Another really fun and delicious option is to use a good sugar cookie dough instead of pie crust. Crispy and tasty!

Cherry Pie (Adapted from Cook's Illustrated)

For the crust:
1 uncooked bottom pie crust
1 uncooked lattice top pie crust
3 Tbsp Pearl Sugar or Large Crystal Sugar

Filling:
4-6 Cups fresh pie cherries, washed and pitted
1/2 tsp cinnamon
1/2 tsp almond extract
1 1/2 Cups sugar
1/4 tsp salt
1/4 Cup cornstarch or 1/8 Cup Tapioca Flour*
*Note - if using tapioca flour, increase the salt to 1 tsp

Mix the filling ingredients and let stand for 30 minutes. This will allow the cherries to weep and make a nice cherry syrup for the pie.

Pour the filling into the crust and weave the lattice on top.

Brush or spray the top lightly with water, and sprinkle the Large Crystal Sugar on top, making sure that as much as possible sticks to the lattice.

Bake at 400 for 30 minutes, then 350 for 30 minutes. If the crust is too brown 30 minutes in, cover it loosely with tin foil. If the crust isn't brown enough after an hour, turn the oven up to 425 for 10 minutes to brown the top crust. If you do this, be sure to check it every few minutes to make sure it doesn't burn.


For this one we used a mix of Montmorency and Thompcin cherries and cut down the sugar a bit as the Thompcins had a bit more natural sugar. But they gave the pie a gorgeous red syrup and a rich, lucious cherry flavor.

I love cherries and almond, but for other ideas, try substituting the almond extract with Vanilla extract + vanilla bean seeds, or Orange extract + Grated orange peel, or Orange Blossom Essence. Cherries + floral essence is crazy good but very unusual so it's not for everyone.

Saturday, July 30, 2011

Summertime Stonefruit - Cherries!

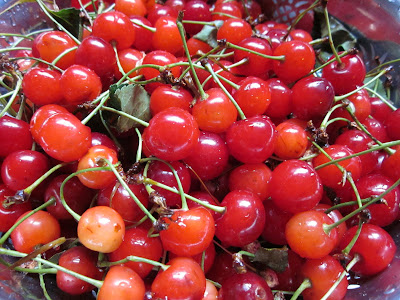
Montmorency Cherries, Fresh off the Tree

Every year I do a big summer food project. For a few years it was fruit butters, then conserves (a delicious sweet jam made with nuts and dried fruit) and recently it's been pickles, dilly beans or pickled beets. This year I was at Fred Meyer and couldn't resist the $10 cherry pitter they had on sale and that decided that. Cherries it is! I snagged it and trundled off to find cherries.

But not just any cherries: pie cherries.

In our neck of the woods it's Bings and Rainiers that you find most often: sweet, plump and meant to be eaten out-of-hand, they're delicious fresh but pretty awful for cooking and lose their texture and flavor once heated.

Pie cherries on the other hand, are closely related to wild cherries and are small, firm and SOUR, SOUR, SOUR! Really sour. As in turn-your-face-inside-out sour. These are your best cooking cherries and (once sweetened) will turn out the best cherry pie you've ever had in your life. If you've never had a fresh sour cherry pie, go find one. It'll change your life.

You can't find pie cherries in stores. They're in season for about 2.5 seconds, bruise easily and spoil within 48 hours of picking. They're really difficult to keep pristine and perfect looking. Shoppers don't want to buy them so they're just not profitable for groceries.

But... if the cherries won't come to me then I shall go to the cherries. We made a cherry run to Naches, Washington to visit Thompson's Farm. I think I got a little excited when I saw the trees because I changed our original order of 40 lbs to 70 POUNDS OF CHERRIES. I don't know what I was thinking (except maybe, YUM!).

Montmorency on the Right, Mystery on the Left


Thompson's had two different cherry varieties: a bright red Montmorency, which is the traditional super-sour french pie cherry, and mystery variety (I do love a good mystery!) of unknown type or origin that has been on the farm for over a century. It's a black pie cherry - a gorgeous dark, dark red/burgundy, with dark flesh and juice. Area nurseries have tried to identify it and propagate for years without success so we were really fortunate to get some!

Cherries in tow, we headed back over the mountains and spent the next two days pitting and processing fruit. What do you do with 70 pounds of sour cherries, you're wondering? What DON'T you do? There's a ton of options, but I've posted my two favorites here:

Perfect Cherry Pie
Cherry Bounce


My $10 cherry pitter. It's brilliant.

Sunday, May 22, 2011

Steamed Mussels

Last weekend the crew made our first trip of the year down to Ye Olde Family Beach Haus. The spring weekend brought many of the usual things: fun times, relaxation, good drinks, weather that couldn't make up its mind, and of course, plenty of awesome food, some of it plucked from the beach or pulled from the water an hour before it was eaten. Such as these lovely invertebrates here:

Mytilus trossulus, the humble yet prolific Blue Mussel
Blue mussels (also called Foolish or Bay mussels) grow in abundance here in Puget Sound, their blue-black shells hanging in thick clusters from the bottoms of floating docks and buoy ropes. They're tastiest in late summer, but if there are no pollution or marine biotoxin warnings, they can be harvested all year.

Mussels are one of those foodstuffs which are a royal pain in the ass to prepare, but are well worth the effort. Cooking them is simple, it's the cleaning and prep that takes time: after pulling them off the dock in clumps, mussels must be separated, the beards pulled off (by yanking the fibrous byssus towards the pointy end of the closed shell), the shells scrubbed, and the whole lot cleaned several times in fresh water. Lexi and I generally accomplish much of this at the water's edge, easing the effort with a liberal application of sunshine and many refills of the Foofy Drink of the Day.

Once prepped, mussels can be used in a wide variety of seafood recipes. Sweeter and smaller than oysters with a texture similar to steamer clams, they easily find a home in paella, cioppino, or seafood chowder. They also stand well on their own, served cold with malt vinegar or a dipping sauce laced with dill. And, of course, they're divine when steamed, served in their own broth with plenty of melted butter and bread for dipping.

In the past we've steamed them in a mixture of coconut milk, broth, red Thai curry paste, lemongrass, and cilantro. This time I went for a more traditional recipe.

STEAMED MUSSELS

Ingredients:
1 part dry white wine
1 part chicken broth or water
1 tomato, diced
3 to 4 cloves of garlic, crushed or minced
A handful of fresh parsley, chopped (optional)
1-5 lb. fresh Blue Mussels, cleaned & de-bearded

Directions:
Add all ingredients but the parsley and mussels to a heavy stock pot and bring to a near-boil. Add mussels. Cover and reduce heat to medium-low. Steam covered for 5 minutes. Add parsley and steam uncovered for another 3 minutes. Drain and serve with crusty bread and melted butter. Optionally, ladle into individual serving bowls, broth and all, and let guests dip their bread into the shellfish broth as an added treat.

Steaming shellfishy goodness.

Tuesday, March 29, 2011

French or English Lemon Apple Pie

Unbaked Pies in the form of Tarts

This recipe comes via my family. There's no way to know how many generations of my relatives have enjoyed it after dinner... My mother has been making it as long as I can remember and it's absolutely delicious - especially since there are no 'traditional' spices in it. This pie is flavored with lemon and sugar only - no cinnamon or nutmeg at all. The result is a breathtakingly refreshing pie that tastes like freshly picked apples.

It's labeled either 'French' or 'English' depending on the whim of my mother. We'll call it Anglo Saxon. One tip I've learned is to have everything except the apples mixed in a large bowl - especially the lemon - and as you grate the apples, stir them quickly into the mix. The citric acid keeps them from browing as you work.

Here are the directions verbatim, as passed on from my grandmother, to my mother and then to me:

1 unbaked pie crust
3 medium sized apples
1 ½ Tbl butter
½ Cup Sugar
2 eggs, well beaten
Grated rind and juice of 1 lemon

Cream sugar and butter. Add eggs and lemon, then the apples grated fine. Pour mixture into an unbaked pie crust. Bake at 350 for 30-40 min or until a knife inserted in the middle comes out clean.

Absolutely lovely with vanilla-rose icecream.

Monday, February 21, 2011

Jeff's Chicken Noodle Soup


Everybody loves chicken noodle soup. Not loving chicken noodle soup is like not loving your grandmother or puppies or sunsets: it's almost immoral. Unfortunately too many people are exposed only to the oversalted, flavorless canned versions found in the soup aisle of the local grocery store. Such may be okay for a starving college student in need of a little protein, but they pale in comparison with chicken noodle soup made from scratch. So simple, so basic, and sooooo good.

This recipe comes from our friend Jeff. Still at the start of his own foray into the world of delicious things, he brought ingredients down to the New Year's weekend and one afternoon we guided Jeff in cooking his first batch of homemade chicken noodle soup. It was heavenly.

INGREDIENTS
White meat chicken (1 breast per person, 1" dice)
Carrots (sliced into rounds)
Celery (sliced)
1 smallish onion (diced) and/or 2-3 cloves of garlic (minced)
A few Tbsp. of butter or cooking oil
Chicken broth (make your own, or use commercial broth)
Egg noodles
Salt & pepper
Seasonings to taste (choose herby things: parsley, sage, thyme, basil, a sprinkling of oregano, etc.)

INSTRUCTIONS
1. Brown the chicken and onion/garlic in oil or butter at medium heat in a largish pan. (I tend to use the stockpot I'm making the whole batch of soup in anyway, for convenience and to avoid splatters.)
2. Add the carrots and celery. Cook, stirring occasionally, until the celery is translucent. Add more oil to prevent sticking if needed, and watch the heat - browning is OK, but no burning.
3. Add seasonings to taste. For Jeff's soup we used parsley and basil. Dried is fine, fresh is better. Pesto works too: add a teaspoon or two of your favorite.
4. Let the seasonings heat up for 5 minutes or so, then add chicken broth (about one 28-oz. box for every two people, plus a little more). Raise the heat to high, bring the soup to a near-boil (not a full rolling one), then reduce heat, cover, and put on simmer until the chicken is completely cooked (about 15 minutes).
5. While the soup is simmering, cook your egg noodles according to package directions. Drain and add to the soup.
6. Serve with crusty bread, or little corn muffins, or a green salad.

TIPS
If you're making this because you're sick with a cold or the flu, you can up the onions and/or garlic, and add seasonings such as cayenne or chili peppers to add spicy heat.

Keep the ratio of noodles to liquid fairly low, especially if you're going to be keeping the soup overnight in the fridge. Noodles will absorb a lot of liquid and you don't want to end up with a big block of half-soggy chicken-flavored noodles.

Other noodles work well too, not just egg noodles. The smaller bite-sized types work best: rotini, bow tie pasta, even macaroni.

General rule of thumb for seasonings: use less of the stronger herbs (such as oregano or rosemary), more of the mellower ones (like parsley).

Leave the noodles out entirely for a basic chicken soup. Freezes well.

Saturday, February 12, 2011

Ärtsoppa (Swedish Golden Pea Soup)

Split Pea Soup


Pea soup is ubiquitous in Northern Europe. It's simple, hearty, inexpensive and can feed an entire family for days from the same pot, but it's also got some interesting history. Remember the old 'Peas porridge hot, peas porridge cold, peas porridge in the pot, 9 days old' rhyme? It likely dates back to the middle ages, when it was common to put a pot of thick pea-based stew on the fire and as the stew was consumed and the pot neared empty, more ingredients were thrown in to top it off. A pot of stew left like this could be continuously on the fire for days or weeks at a time.

There's been a movement to 'modernize' pea soup from sources like Saveur and Cook's Illustrated, recommending less cook time and a more complex preparation. The results tend to have a texture more like a pot of beans, with every pea separated and an unfamilar flavor. These are great on their own, but I wouldn't consider them pea soup. The Greeks have a traditional version of this soup which is nearly identical to the Scandinavian versions, and even some African countries do.

The bottom line? Everyone loves pea soup! This is a go-to comfort food for millions of people that is definitely best the old fashioned way: thick, creamy and full of smokey bits of ham.

Split peas are related to lentils and come in a variety of colors and sizes. The most common in the US is the green split pea, but dried whole green peas, yellow peas, or any color of lentil can be substituted. Whole Golden Peas are traditional in Scandinavia and it makes a beautiful, cheery yellow stew. You can also mix and match - half and half yellow and green peas will keep your pea soup bright green with no chance of it looking murky or grey. If substituting lentils for the peas in this recipe, make sure to wait and add the lentils only in the last 2 hours of cooking, since they cook much much faster than peas do and will break down quickly.


Ingredients
1 Large Crock Pot or slow cooker
2 C Split Peas
2 Sweet or Yellow Onions
4 Bay Leaves
1 Smoked Ham Shank
5 C Water

Salt and Pepper
1/4 C Red Wine Vinegar

A note about ham: Your choice of ham will make or break this soup. Choose high quality ham with lots of smokey meat on it - shanks are better than hocks, which are mostly gristle. Alternatively, just use a small boneless ham but try to find one that's all natural or cured without nitrites if you can. This will make your soup both tastier and healthier. (Yes, those are hocks in the photos. Do as I say and not as I do!)

Rinse the peas in a colander and pick out any stones, stems or bad peas.

Peel and dice the onions. Big chunks are ok but small diced onion will cook faster. You can even shred them on a cheese grater.


If using dried peas, reserve 1/2 cup of peas and throw the peas, onions, ham, bay and water into the crock pot. If using lentils or soaked peas, reserve all the peas and add them in to the rest of the ingredients after 2 hours.


Cooking times vary a lot. The best advice I can give is to make this first on a day when you're home and can check it often. Length of cooking will vary depending on how fresh your peas are, what kind you're using, and the size and type of ham in the pot. To speed it up, soak your peas (don't soak lentils) overnight in a bowl covered with water. I don't recommend this method - the ham never gets enough time to cook and the soup tastes a little watered down.

8-10 Hours: Unsoaked Whole Dried Peas
6-8 Hours: Unsoaked Split Peas
2-4 Hours: Dried Lentils, Soaked Peas

Set the crock pot on High for 30 minutes to bring everything up to temperature, then turn it down to Low or Warm. It's good to check the soup every half hour or hour and stir it, though it's not strictly necessary. Cover the pot with a towel to insulate it.

Ham Hocks, steamy and tender after 4 hours


After 4 hours, check to see if the ham is cooked: it'll be tender and falling apart to the touch. Once the ham is cooked, pull it out and let it cool for about 30 minutes so you don't burn your fingers, then shred all the good meat back into the soup and add the reserved peas. This will add some texture to a soup that would otherwise be just a thick slurry. Throw out the ham bones, gristle and skin.

The Final Product


Continue to cook until you like the texture. It should be creamy and thick without any crunch. If the soup gets too thick, add a little water to thin it.

Add the Red Wine Vinegar, then salt and pepper to taste. Serve with crackers.

Delish!

Thursday, February 10, 2011

When Recipes Go Wrong

I'm lucky. Just about everyone I love adores food and can cook pretty well, and I live in a land of plenty. I'm fortunate, then, to be surrounded by lots of food, and lots of people who can prepare it well, and who like to do so. It's rare enough for a meal to be truly mediocre - and even more rare for one to go terribly, nightmarishly wrong.

But it does happen, now and again.

I've cooked noodles beyond the point at which it was morally acceptable to eat them, they were so floppy and spineless and mushy. And my dear spouse, who loves to fiddle around with random ingredients in random ways (and usually comes up with orgasmic flavors from the most unexpected combinations), once cooked a hot dish with feta cheese in it that smelled so bad I couldn't eat it, much less share a kitchen with it. It literally made me gag.

My dad, who can slow-roast a chicken over hot coals until it sweats crisp, buttery, smoke-laced goodness, has the unfortunate tendency to overcook vegetables. He's also been known to drop or spill dishes in spectacular style at family dinners: the story of him showering his grandfather with raspberry compote at a Thanksgiving affair many years ago is a family classic.

My mom had a couple of recipe disasters that are still the backbone of cautionary tales against bad cuisine at family gatherings. Bless her, she had one of the best recipes for oven-fried chicken that I've ever had in my life... but her pot roast still gives me nightmares. And I don't mean the kind of nightmare that you wake up and shake off, I mean the kind that you wake up from screaming, in a cold sweat, and you're afraid to go to sleep the rest of the night. I have no idea why it was so bad - maybe it was the cut of meat? Maybe it was the seasoning she used on it? I have no idea.

Her meatloaf was never much of a success either, and is probably the reason why I don't really like meatloaf to this day. She tried everything she could to make it appealing, but when she made her Meatloaf Surprise... zombies rose from their graves around the city, the seventh seal was broken, and an unholy wrath was unleashed upon our dinner table the likes of which even god has never seen. What was the surprise? She baked a dill pickle into the middle of the meatloaf.

Needless to say, that was the last meatloaf mom ever made.

Even good cooks can fuck up a meal. Feel free to post your cooking disasters in the comments section.

Monday, February 7, 2011

Gwen's Comfort Foods

Brought to you by homemade oatmeal cookies.
Believe it or not, I used to be a really really picky eater when I was a little kid. The list of things I'd willingly eat was very short, and dominated largely by peanut butter and jelly sandwiches on white bread. Hot dogs, grapes and/or raisins, juice, my grandmother's pepperoni pizza, and Top Ramen rounded out the list. I couldn't stand milk, and wouldn't drink it until my mom discovered acidophilus. Twinkies were my favorite dessert. I was one of those kids who wouldn't eat a food I liked if it was even sharing a plate with a food I didn't like or found suspect, and if those foods were touching each other, it was the end of the world.

At some point hovering around high school I actually started trying a lot more kinds of food. Living in a major port city on the Pacific Rim, there were plenty of food choices: Korean, Chinese, Thai, Mexican, Moroccan, Lebanese, seafood, fusion cuisine, soul food, pub grub... you name it, my hometown's got it, and got it good.

I also gained a greater appreciation for the feasts my family would put on, based on decades of tradition. Thanksgiving dinners at my dad's parents' house involved turkey with all the trimmings; green bean casserole, cornbread sage stuffing, mashed potatoes, homemade gravy, and grandma's pumpkin pie rounding it all out. My mother's family, with their roots in the British Isles, brought the richness of roast lamb and beef, twice-baked potatoes, popovers, and apple pie with sharp cheddar cheese.

I love food. That should be obvious; after all, I write a food blog with my BFF, and I wouldn't do it if I weren't utterly enchanted by all the sensual possibilities food has to offer. It doesn't just fill you up and keep you alive, food is an integral part of social interaction, and - for me, anyway - a pleasure critical to my mental health, not just nourishment for my physical well-being.

Arguably, any food is comforting in its own way: if it looks good, tastes good, smells wonderful, has the right texture and temperature in the mouth, and leaves a satisfying feeling in the belly, food is a success. But comfort foods are a little bit different: a lot of my comfort foods aren't things that I'd normally eat. Maybe they're a funny color, or they're not that healthy, or they really don't taste that good, except in the moment that I eat them. And I eat comfort foods when I'm driven by a particular mood: I eat them when I need succor and soothing. They're often the foods of childhood, and what comes with them is a remembrance of how I felt when I ate them as a kid.

I eat comfort foods in moments of vulnerability, when I've had a crappy day or week and need time alone to recuperate. These are solitary foods, rarely eaten in the company of others (unless it's a night in with the girls, spent commiserating about life's downs). This is not the kind of food that cements relationships, but the kind of food that helps get you through a long dark teatime of the soul.

Here's my list. Feel free to post yours in the comment section.

Peanut butter and jelly sandwiches (white bread, creamy peanut butter, grape jelly)
Popcorn with salt and butter
Baked potatoes with butter, salt and pepper
Boiled red potatoes tossed with dill and butter
Hostess Twinkies or Golden Cupcakes (the latter are hard to find)
My grandmother's potato salad (bland, simple, starchy)
Macaroni and cheese
Tea with cream and sugar, and little cookies
Biscuits and gravy
Southern cooking (sweet tea, hush puppies, fried chicken, sweet potatoes, etc.)
Blueberry pie with vanilla bean ice cream
Beer milkshakes
Chicken pot pie
Chicken noodle soup
Chili dogs

Sunday, January 30, 2011

Tortilla Soup


One of our favorite party recipes is Tortilla Soup. It's one of those dishes that has a very simple base, but can easily be dressed up and turned into a big participatory production of a meal, suitable for a potluck or summer dinner party. It's equally good if you just keep it simple and straightforward, for a warm treat for two on a chilly winter's night.

Spouse and I have our own variations on this same dish, but the basic production is the same. Photos are by spouse, of a version he whipped up last November.

INGREDIENTS
Tortillas (corn or flour, though we tend to use flour)
Chicken (1 breast per person, or equivalent)
Olive oil
Garlic
Onion (optional)
Chipotle and/or ancho chili seasoning
Cumin
Chicken broth
Avocados
Mexican blend cheese (pepperjack also works well)

INSTRUCTIONS
1. Slice the tortillas into thin strips. Arrange them in a single layer on a baking sheet and put them in a warm oven (about 250F) until they're browned and crisp.
2. Heat a few tablespoons of olive oil at medium to medium high heat in a deep frying pan (I usually just do this in the pot I'm making the soup in). Olive oil has a low flash point, so don't heat it too hot too fast, or it'll burn and be totally disgusting.
3. Add two cloves (or more, if you like) of minced garlic to the pan and sweat for 5 minutes or so. Optionally, add a diced small white onion here too, and sweat it until translucent but not browned.
4. Cut the chicken into thin slices and add to the pan. Add your seasonings to taste: I prefer cumin and lots of chipotle, but spouse goes more for cumin plus adobo. A few shakes of a Mexican oregano are nice here too. Add enough seasonings to really coat the chicken - think one or two tablespoons here, with less cumin than anything else. If you like it hot and spicy, you can also add cayenne here.
5. Stir occasionally so the chicken browns lightly on all sides. Once the chicken is browned, add chicken broth. Turn the heat up to high, bring to a boil, then reduce heat to low and simmer until the chicken is cooked (about 15 minutes or so, but do a fork test).
6. Dish into bowls and garnish with tortilla strips, sliced or diced avocado, and cheese.


That's the basics: chicken, tortilla strips, avocado, and cheese. Where you can dress this soup up is in the presentation: you don't really have to limit yourself to just those ingredients. In the picture above, for instance, you can see that spouse has added red beans to his soup. To serve party style, set up a bunch of bowls on the table or buffet with lots of other garnishes guests can add at will. Possibilities include:

Diced tomatoes
Sliced olives
Cilantro
Sour cream
Pico de gallo
Salsa verde
Black bean salsa
Chorizo
Diced red onion
Hot sauces
Wedges of lime

Goes down well with lemonade or a nice light beer. Ice cream makes a good dessert, or perhaps a lemon custard.

Saturday, January 15, 2011

Grub and Guinnessy Goodness

A Black and Tan is a drink made by layering two beers of differing specific gravities. Officially, the beers involved are Guinness and Harp, but we're not always official at Chez Gwen. Done properly, the end result is a lovely bicolored concoction. Trouble is, ya gotta be careful where you ask for these things, as the name can also conjure brutal memories of the Royal Irish Constabulary Reserve Force. Yikes.
A much friendlier sort of Black & Tan.
There are plenty of variations on the Black and Whatever theme; all involve Guinness and some other beer or liquor. There's also an art to getting the pour right - which I didn't know, so totally shagged it up the first time I tried. Fortunately more libationally experienced heads prevailed, and we came up with a couple of successful pours.

Black Rain: Guinness & Rainier
As mentioned, a genuine Black & Tan should be Guinness and Harp, but we didn't have any Harp at the time. Rainier also holds a special place in our little geek hearts, since most of us are Pacific Northwest natives: we have fond memories of the classic ad campaigns Rainier did way back in the 70's, and the bright red neon "R" gracing the top of the brewery next to I-5 was something of a beacon on many a dark, rainy night. Straggling in, tired and hungry, from some endless road trip, seeing the "R" always meant you were almost home.

And it goes strangely well with Guinness. Something about beers made in wet, rainy, green places, that must be it...

Black Gold: Guinness & Goldschlager
Never thought Guinness and cinnamon would go together, didja? Neither did we, but oddly enough, it works, in a really sweet-bitter-spicy-dark-smoky kind of way. The gold flecks are quite pretty too.

See? Sparkly!!
And what sort of noshies go well with Guinnessy concoctions? Well, Lexi's amazing Angels on Horseback, for one:


These are one of those incredibly simple but incredibly good noshes. They're nothing more than oysters wrapped in bacon and sprinkled with brown sugar, then broiled. The oysters, of course, were harvested from the beach outside and shucked about an hour before this recipe was made. That night we also did oysters on the grill, cooked over medium hot coals in the shell until they pop open, and then eaten with a variety of condiments, including:
  • Melted butter (clarified or not - some prefer it, others don't care)
  • Soy sauce
  • Wasabi
  • Horseradish sauce
  • Cocktail sauce
  • Worcestershire sauce
  • Rooster sauce (Sriracha)
  • Mayonnaise
  • Lemon wedges
And sometimes at these parties, Guinness is a breakfast food:

"Still life with Nutella, Rainier, Goldschlager, and doughnuts"
Spouse also makes a very hearty and delicious Guinness beef stew. Pix and recipes forthcoming.

Wednesday, January 5, 2011

Pan Galactic Gargle Blaster Recipe

For New Year's we had an absolutely smashing good time down at the family beach house. We spent four days doing nothing but cooking, eating, drinking, watching scifi flicks, and generally indulging in a luscious gastrogasm of all things delectable. To start the deluge of deliciousness, I thought I'd post my recipe for a geek classic: the Pan Galactic Gargle Blaster.

The Best Bang Since the Big One.
Fans of quirky britcoms, scifi, and general geekdom will recognize the PGGB from the late great Douglas Adams' Hitchhiker's Guide to the Galaxy 5-book trilogy. Drunken geeks the world over have formulated redactions based on the recipe laid out on the first page of chapter two:
  • Take the juice from one bottle of the Ol' Janx Spirit.
  • Pour into it one measure of water from the seas of Santraginus V -- Oh, that Santraginean water... Oh, those Santraginean fish!
  • Allow three cubes of Arcturan Mega-gin to melt into the mixture (it must be properly iced or the benzine is lost). 
  • Allow four liters of Fallian marsh gas to bubble through it, in memory of all those happy hikers who have died of pleasure in the Marshes of Fallia.
  • Over the back of a silver spoon float a measure of Qualactin Hypermint extract, redolent of all the heady odors of the dark Qualactin Zones, subtle, sweet, and mystic.
  • Drop in the tooth of an Algolian Suntiger. Watch it dissolve, spreading the fires of the Algolian Suns deep into the heart of the drink.
  • Sprinkle Zamphour.
  • Add an olive.
  • Drink... but... very carefully...
Drunken geeks that we are, this is our redaction. With action poses shot by Lexi!


You will need:
2 parts Bushmill's Whiskey (that Ol' Janx Spirit)
1 part Bombay Sapphire gin (water from the seas of Santraginus V)
A bunch of ice (cubes of Arcturan Mega-Gin)
4-6 parts Squirt, Sprite, or other suitably bubbly, lemony fizzy thing (Fallian Marsh gas)
Rumple Minze (Qualactin Hypermint extract)
Sugar cubes and Triple Sec (the tooth of an Algolian Suntiger)
Yellow or orange sprinkly baking sugar (Zamphour)
Lemon slices (or an olive if you really do want to be canon)
A big pitcher
Several teaspoons

Instructions
About a half an hour or so before mixing up your drinks, put the spoons in the freezer. (Seriously.) Then schmooze with your guests, noshing on finger foods and exotic appetizers while you slice the lemons thinly and set out drink glasses. I recommend making a big production of this one, as it's a dramatic drink with a great back story.

Mix the first four ingredients in a big pitcher (whiskey, gin, ice, and soda). Ratios are approximate - adjust as your tastes desire. This recipe is very much a work in progress and I've been trying to work out the best balance of whiskey to lemon flavor. It's getting better all the time...

Pour the mixture into lowball glasses, one for each guest. Guests who drink more than one are either very foolhardy or very brave (or both).

Fizzy, lemony, spirity magic!
Remember those spoons you stuck in the freezer a half an hour ago? Go get the spoons out now. Pour a tablespoon or so of Rumple Minze over the back of them into each glass.

Why? It just looks cool! Duh!
Pour out a small layer of Triple Sec into a dish or saucer. Dip sugar cubes in the Triple Sec and drop them, two at a time, into each drink.

Algolian Suntiger teeth
Sprinkle some of the cookie sugar into each drink. The sugar I'm talking about here is that sprinkly colored sugar you find in the baking aisle at the grocery store for topping off cupcakes and cookies. This doesn't really do much of anything to the flavor, but it can enhance the color a little and adds to the overall presentation.

Put a lemon slice in each drink. I know, I know, the book says "add an olive", which little fruit carries the historical weight of being the classic cocktail garnish for a stiff British martini - but frankly, the olive ruins it. The flavor is simply all wrong. So I break canon (yeah yeah yeah) and use lemon slices instead.

Breakin' canon, bitches!!
Drink... but... very carefully...

Having one too many of these really is like having your brains smashed out by a slice of lemon wrapped around a large gold brick.

Monday, January 3, 2011

Cocktail: Citron Snaps

Aquavit Lemon Dill Cocktail

Herbal and tart, this cocktail tastes like a sunny summer afternoon and is best when consumed on a lakeshore in July. Aquavit cocktail recipes are rare, so I developed the recipe for a neighborhood night at a local watering hole in my historically-Scandinavian 'hood. The flavors are caraway, dill and lemon; if you like lemon drop martinis, this is for you. Only fresh lemon juice will do, and the same with the dill. Of course, you could use both plastic lemon and dried dill for that mm-mm plasticy ass taste.

Juice of 1/2 lemon
3 sprigs of fresh dill
1 large jigger caraway Aquavit (like Linie)
2-3 Tbl Simple Syrup (ratio of 2 parts sugar to 1 part water)

Add all the ingredients to a martini shaker with some ice. Shake HARD. Shake it like you mean it. Shake the living hell out of it. Shake it till it calls you Daddy. The idea is to bruise and break the dill with the ice so that it infuses the drink with flavor.

Pour into a chilled glass and serve.

Linie ad campaign, anyone?